Detect material and assembly defects at an early stage
Computer Vision for better quality assurance
Artificial Intelligence for production process and control automation.

Quality matters
Detecting quality defects is often crucial to prevent customer dissatisfaction or even damages in a production line. To guarantee a high-quality standard there is a constant inspection in place, today often manually.
Technology, however, comes to our aid whenever human limitations enter the equation: a combination of classical image processing and latest Machine Learning approaches allows to detect and distinguish known objects from foreign objects or ones with unexpected variations.
The challenge
Spotting surface imperfections & foreign objects
In production, there are irregularities which can be tolerated and others that must be detected: for example, shipping materials with surface imperfections will most likely result in customer dissatisfaction. When it comes to foreign objects, instead, if undetected they can create serious damage to the machine they’re in.
In both cases, the stakes are high, and avoiding damages requires extensive quality assurance activities. Today, inspections are often still done manually, which is not optimal for several reasons. On the one hand, this is often an unfulfilling, repetitive task that requires a high focus from human beings for longer periods of time – something our brains are notoriously bad at. On the other hand, it comes with high costs.
The solution
Combining different methods for a flawless result
We apply Computer Vision methods to perform such QA tasks.
We look at images showing flawless manufactured items as well as at images of different types of defects. Among the methods we apply, there are classical approaches such as image enhancement or background removal, but also Machine Learning algorithms for object detection and classification as well as anomaly detection.
A common scenario is a camera looking at a certain part of a machine or production line. However, our approach is not limited to a specific sensor – we work on several data sources including infra-red cameras, line scanners, and X-Ray technology or 3D point clouds.
We read in pixel data and compute a decision if the content meets the acceptance criteria or not.
We have several tools supporting this process, from annotating test and training data, to managing Machine Learning pipelines including evaluation and hyper parameter optimization. In the end we optimize the learned models for efficient use in production.
Let’s have a look at two specific uses cases.
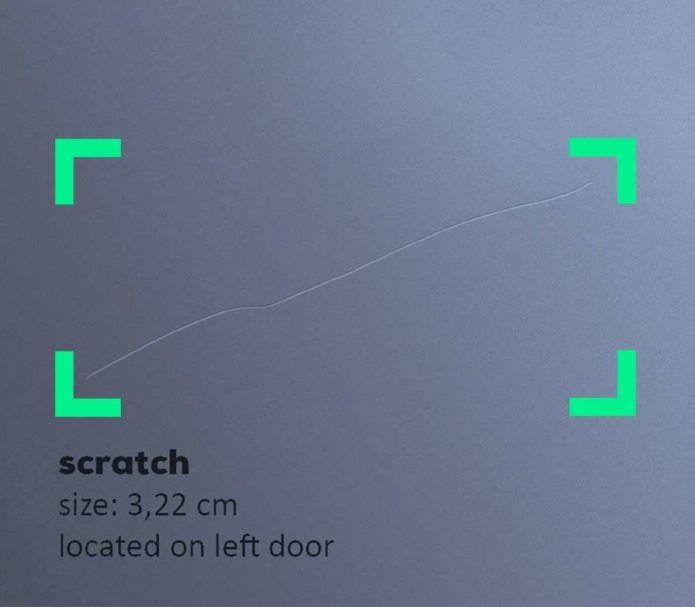
Surface imperfection detection
Imperfections of a material’s surface can be an aesthetic issue on the one hand, but on the other prohibit its usage in certain scenarios. To guarantee the right level of quality of a manufactured item, we detect every visible irregularity.
In addition, we not only compute metrics such as the shape or the extent of a defect but also apply classification about its type. While certain types of defects might be tolerable, others will be deal-breakers. The information we collect also helps to identify the cause of the defect.

Foreign object detection
In a production line or during packaging, very detailed assumptions about the incoming material are made. Foreign objects being conveyed into a machine might destroy the machine itself or, when packaged and caused damage at the very least annoy the consumer.
Thus, the detection of any foreign object is necessary in order to take preemptive action. In the figure above, you see a stone that was erroneously harvested together with apples and that needs to be separated before any subsequent treatment.
